Stage 6 – Moving

Well, not quite the update I had planned, but I knew this was coming. We are in the process of moving houses, which means this beast of a machine has to get moved as well!  After, I removed anything that might jostle around inside, I used the opportunity to snap some more pics of the whole thing.

On one of the pictures above, you can see how the control panel top has been hinged. This allows easy access to the controls for maintenance or modification.

A lot of the pieces of the machine are removable.  Above is the control panel, which is basically a big box that can be removed and also above is the front ‘glass’ (smoked acrylic sheet) that protects the monitor.


Took everything out from inside and getting it through the door. There is probably less than a half inch of wiggle room with the doorframe. That has made it tough, and ended up with some scratches on the side. Some touch up painting is planned for Summer. Also, lucky I added wheels on the back, can’t imagine trying to get that thing to budge with just feet!


And down you go…..!

IMG_2461


After it arrived at the new house, I added some shelf brackets inside to mount the PC and subwoofer. This will make it much easier when having to move it around the house. That likely won’t be too often, once we’ve decided on a spot for it.

Well, that’s it for now. Likely going to be very busy with moving till the end of the month, so I’m not sure when the next post will be. Hopefully I’ll have a chance to get the post about Art up. Till next time!

Stage 5 – Some Assembly Required

After I finished all the sanding, painting, sanding, painting, sanding, …you get the idea, I brought all the pieces inside to make sure they start to dry really well.

I then started putting things back together to make sure it was all working out. I tackled the assembly of the Speaker panel and had to make a few adjustments there.

It turned out pretty good. It was mainly the knob, and also I wanted the whole thing to be able to come off the cab, for servicing and access.

I also taped up the inside where the marquee would be, with some metallic tape. Kinda weird stuff, it’s like a foil, and bonds to itself super easy. But it’s pretty useful, as it’s reflective and will increase the light output for the marquee (top portion) art.


I also added an outlet/socket. I was a bit nervous about this part, as I’m not used to dealing with voltage coming out of a house outlet. Luckily my brother-in-law was in town on a visit. Just so happens he got his degree in electrical engineering too.

So I broke out the socket and asked him about it. In no time at all, he had cut off the plug on the surge protector and rewired it into the socket. He even tested it, while I nervously held my breath, haha!

That socket will be on the outside of the cab, and allow me to plug a cable into it to power it. Which leads directly to a surge protector that the computer, monitor, speakers, and lights will be powered with. In later pictures, you might end up seeing what I’m talking about. It will be at the bottom right of the back of the cabinet.


Lastly, those are a couple pictures of the cabinet sub-assembled.

I’ve mainly been busy with getting some art together for the project. I hope to share some of that process next time, as I think it might be more interesting to most of the followers of this blog.

Stage 4 – Painting (and Sanding)

I spent a lot of time at this stage. Feels like an eternity most times.


One night while I was busy painting, this visitor managed to sneak its way across the kitchen floor. Maybe it wanted to see what was taking me so long?!

So way back when I painted the base (yea, I’m telling parts of this story out of order), I decided it was an appropriate time to test types of paint. For this job, there is essentially brush on paints like acrylic or oil based. Alternatively you could buy a lot of rattle cans and go to town.

On my first cabinet I used an acrylic based primer and paint. The paint job was adequate, but not something I would be super proud of.

So, I tested on one side of the base board, an oil-based primer and an oil-based paint. Then an acrylic-based primer and paint on the opposite side. All of them purchased from the local big box hardware store that rhymes with Gnome Sheep-Doh. This also gave me a chance to test out two different colors of blue, since the original blue I used didn’t seem to be available any longer.

Oh yea, I decided to paint in the same black and blue pattern as my original cab, long ago. Very original, huh?!

arcade_262

So, what did I learn from my test? Not too much, I’m afraid.

The oil primer went on really nice and looked beautiful. I really didn’t want to use oil because it’s way harder to clean up, but it won me over. The acrylic primer/paint was gummy, and a pain to sand. However, the oil paint had more lumps and using a roller brush with it seemed to leave more marks than on the acrylic. I came away from all that, thinking I would use an oil-based primer with an acrylic paint over the top (yes, that’s doable).

However, over time, and much jostling around of boards, I noticed that the oil based paint on the base board still looked really nice and was holding up quite well. So, back to oil on oil, right?

I had lots to do, and many boards to paint.

Pretty much 3 layers of primer per board, a side per night. I would haul the boards out back, sand away at 320 grit. Bring them back into the garage to paint. Let them begin to dry, then stack them away somewhere so that we could get my Wife’s car back in the garage. Yep, lots of work.

After the first couple coats of black on the boards, I found the “semi-gloss” to be too glossy. It also really bothered me that I was able to sand to a silky smooth surface with the primer, but the paint didn’t have that same finish and sanding didn’t seem to help.

So, I ran down to an actual paint store, looking for advice. They hooked me up with their most expensive paint. Apparently, the word “sucker” is tattoo’d on my forehead. This time I went with a satin finish, which is probably all I needed in the first place. The paint they set me up with was acrylic based, but it seems to do just fine. At this stage I wasn’t going to change again….because the weather was quickly moving into the rainy season.

So everyday I’m checking the weather forecast and just hoping I could get a few dry days so I could finish the sanding/painting in time.

IMG_2213

That’s one of the boards at a decent stage. I guess one might say it’s a 12″ finish, meaning it looks pretty well unless it’s under close scrutiny. With time running out, just had to do the best I could.

A couple weeks ago I had finished the majority of priming and painting. I would have liked more time to get a better overall finish, but I basically ran out of paint and time. Still, the finish is much nicer than my first arcade cab and will likely look fine to most casual observers.

If I’m ever crazy enough to do this again, I’ll likely skip the paint rollers/bucket of paints, and go with spray cans. The automotive paints can be found in spray cans and can give a really nice finish. The downsides is cost, smell, and I’d really have to setup a spray booth. But likely worth it, as I ended up putting so many coats on with the roller and trying to get a smooth finish was pretty labor intensive/time consuming.

Stage 3 – Woodworking Commences

Last time around, the initial design had been loosely figured out and the first few cuts had been made.

I wish I had spent more time in the design phase, as I discovered that a number of things didn’t go “according to plan”. It has all worked out in the end, but I probably could saved a few headaches with some very detailed blueprints to work off of. I had also planned on building a cardboard mockup, but that got shelved for some reason or other. Moral of the story, spending more time in design will result in less time in development.

Without a set plan, I ended up building the base first and then building up from there. It wasn’t until the very end that I actually decided how tall the cabinet was going to be. I also ended up designing the control panel layout at the very end. My first cabinet went smoother in those regards, because I had used someone else’s design (with blueprints) for the most part. I think I also had a full model in Sketchup with dimensions.

Exhibit A: The Base

I had borrowed the ideas of this base from ChanceKJ’s thread (he actually got it from another forum user). Wheels are important for moving these heavy beasts around. But you also don’t want it to move around too much, so the feet add some stability. This ends up with a cabinet that you can tip back, roll, and set somewhere else. Also, given that I have had to rearrange furniture between rooms so damned much in our house, I knew I better put some wheels on it.

Unfortunately, sourcing the specific leveler feet I wanted and finding matching plates took way more effort than one would think. The wheels required a somewhat complicated apparatus to get them attached just right too.

After getting them all done, I decided to paint. Bravo! Something done!

Not quite…

Remember that bit about not having printed blueprints? Yep, it came to bite me in the butt here. Somewhere along the way, I had attached the wheels and legs to the shorter sides of the base (picture on the left). Of course, I didn’t discover that until after I had it fully assembled and painted. If our teen hadn’t been standing right there when it dawned on me, there would have been a lot of cussing and probably throwing things. Instead, I tried to keep my calm. Quit for the day, and brooded the rest.

It was a depressing moment, having spent all that time. I thought I would have to start from scratch again. After a day or two breather, I started thinking I could just remove most of the boards, redo it, without scrapping the whole thing. Which netted the picture on the right. Not super pretty, but it’s on the bottom of the cabinet and no one will ever see it.

Lesson learned. Don’t paint until all my woodworking bits are done. Which is how I proceeded for the rest of the project.

Woodworking!

blocking / coin door cut


rear access door


template / cutting vent holes


rear access door w/hardware


speaker panel


jumping through hoops to get a volume control knob


solution for holding plexiglass in place


mount for removable control panel (cp), getting the cp lined up


things finally shaping up


IMG_2123

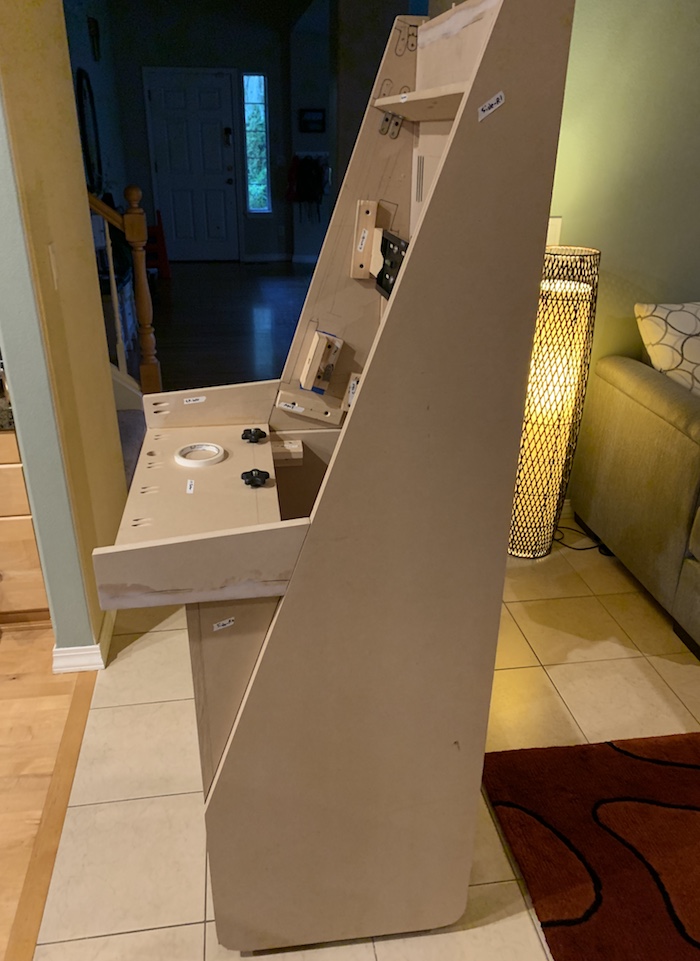
last pic as boards get labelled and the whole thing gets dissembled for painting


Slew of pictures there representing months of labor. The base was the biggest mistake I made, but didn’t set me back too badly. I also had another day where nothing seemed to be going right, and I broke a piece of board. Again, recoverable.

Along the way, I learned about and how to use “pocket holes”.

Had I known that piece of wizardry and how simple it is, I probably would have changed the design a bit and cut out most of the blocking/support pieces I used. Streamlining quite a bit.

I’m still not happy with the method I used for supporting the access doors and am currently contemplating picking up some l-shaped aluminum bracket to try out a sleeker method.

Along the way, I also had an orbital sander, corner sander, and drill go out on me. Two of them were used on my first cabinet, so it’s not surprising given their age.

Oh yea, remember when I initially said “I have the controls from the first cabinet still, all I have to buy is some wood?!”. WRONG. I’ve bought tools, materials, new controls, and made so many trips to the local hardware store almost every weekend. I’ve totally lost track of how much this thing has cost me, but it’s been a lot.

Good tools are essential for something like this though, and I’d probably do a whole post on just tools. I found a good compact circular saw, a sawboard (you can make one yourself), jigsaw, router, clamps, combo square, and shop vac to be invaluable. One the combo square, I had read a bunch of negative reviews on Amazon that dissuaded me. I ended up picking one up from the local hardware store anyways, late in the game, but I used that thing almost every single day since. Really wish I had gotten one early on. Same with the shop vac. This sort of project creates a ton of dust, and attaching some tools to a shop vac (don’t get me started on adapters and hoses) will severely cut down the mess. Also handy for just cleaning up afterwards.

At this point I had wrapped up woodworking. I made a few mistakes, re-learned some things I forgot, and felt like I learned a good deal of new things. I was kind of relieved to be done with this stage, as screw ups can be costly in time and materials. I’m currently finishing up the last of the paint stages, which took a really long time as well. But more on that next time, as I tackle “Painting and Sanding!”.

Stage 2 – Initial Designs

With a working prototype control panel, it was now time to make some decisions. I spent a huge chunk of time reading through posts on the byoac forums. Things were similar to the way I built my first arcade cabinet back in 2006, but there were also a lot of changes. The most challenging was the number of options out there now. Just in push buttons alone, there are a lot of different items to choose from. Do you want a soft/hard push, how sensitive should the response be, do you want it to click, and LEDs. Oh, the LEDs.

Fortunately, I found one thread from ChanceKJ that thoroughly documented his arcade cabinet process. I didn’t want a 4 player cab or a similar shaped cab, but there were a lot of good ideas in there and his thoroughness was very helpful in making some of my own decisions. I also was looking at cabinet shapes/designs quite a bit during this time. One of the cabinet designs really appealed to me, dubbed the “Vigolix“. A combination of username “Vigo” and the “Viewlix” style cabs. It was a simple and stylish design. Only issue was that it wasn’t a full scale cabinet, so I figured I would just ‘scale it up!’.

Vigo’s Vigolix cabinet in red (on the left). Delusional29’s Vigolix inspired cab on the right.

With a design in mind, some rough schematics, I set out to the local hardware store.

Getting that large sheet of MDF on the cart all by myself certainly brought back memories.

Making the first few cuts, I started to realize that simply “scaling up” the Vigolix design wasn’t going to work out like I thought.

IMG_0930

(ignore the broken tip at the top, it got dropped and we planned to remedy that by lopping it off)

The top seemed way too pointy and thin, and the bottom/base seemed way too wide. Here’s my disclaimer once again, don’t do what I do, because other people have successfully pulled off full scale models of this cabinet. So I’m not totally sure where I screwed up this part.

All was not totally lost though. If it’s one thing I’ve learned from my hobbies, the different between novice and master seems to be “learning how to recover from mistakes”! I’ve ran across this in all sorts of art, painting miniature, and especially in woodworking. There always seems to be a way to fix mistakes without having to completely start over. Yea, mistakes can cost you time and money, but at least there is usually a solution.

So in the example above, I noticed that the side panel jutted out way too far. This was a potential tripping hazard for the little one and teen. Also a good chance of that corner breaking off at some point. Another saw cut and a router pattern bit got me back on track. Might be hard to see in these pics, but I also made the t-molding cuts early on. On my first cab, I didn’t make the slot cut until after I had painted the cabinet. I was super lucky to have not scratched the paint at that point, but I didn’t want to risk it again.

T-Molding-Tips-1280x640

“T-molding” is the plastic bumper that they used to line the edges of the cabinet and protect it from wear and tear. You can get it in all kinds of different colors, and really gives the cabinet that distinctive arcade look.

This seems like a good place to wrap up, and will start with some more woodworking pics in the next post (I promise!).


Stage 1 – A New Beginning

Ages ago, I built my own arcade machine. At the time, I had little knowledge of how to go about it and not even all the tools I needed. Thanks mainly to all the information (and people willing to share it) on the internet, I was able to gather the resources to accomplish that project.

It wasn’t the best example of a home built arcade machine, but probably not the worst either. Friends had some fun playing games on it, and that’s what really matters. Unfortunately, life doesn’t always go as planned, and suffice to say I no longer have that cabinet.

I did keep the controls though…and they have been sitting in a box, move after move. Until a few months ago, I got the urge to build once again. My thought at the time was “I already have all the expensive parts and an old computer, all I need is to buy some wood!”. I figured I could knock it out during the Summer, and the family and I would have a blast.

The first step in building the new machine was laying out a control panel, which allowed me to make the buttons a little more ergonomic and get a prototype going early on.

I would go through a few more iterations of the control panel before settling on a design that felt about right. This site was really helpful for getting ideas:

https://www.slagcoin.com/joystick/layout.html

This seems like a good place to wrap up for our first post. I think I should say that what this blog about is, is the journey. This is by no means a “how-to” guide. I will make a lot of mistakes along the way. Even when I’ve stumbled upon solutions that I thought might benefit others, I generally found them to be circumstantial and not easily replicated. I would recommend visiting sites like http://byoac.com/arcade.htm if you’re looking to build your own machine.

Next up: More Woodworking and What Could Possibly Go Wrong?